Scratches and scuffs
The model can rebuild visible marks across a print. Fine lines may fade into the image, while a deep scratch can leave a changed edge or texture.
OLD PHOTOS · AI REPAIR
Restore scratches, creases, tears and worn areas in an old photo. Add color is on by default, or switch it off in Studio to keep the result black and white.
As a guest you get 1 free photo a day with no sign-up, and results have no watermark. Signing up adds 3 free credits. Tools use 1–2 credits per photo.
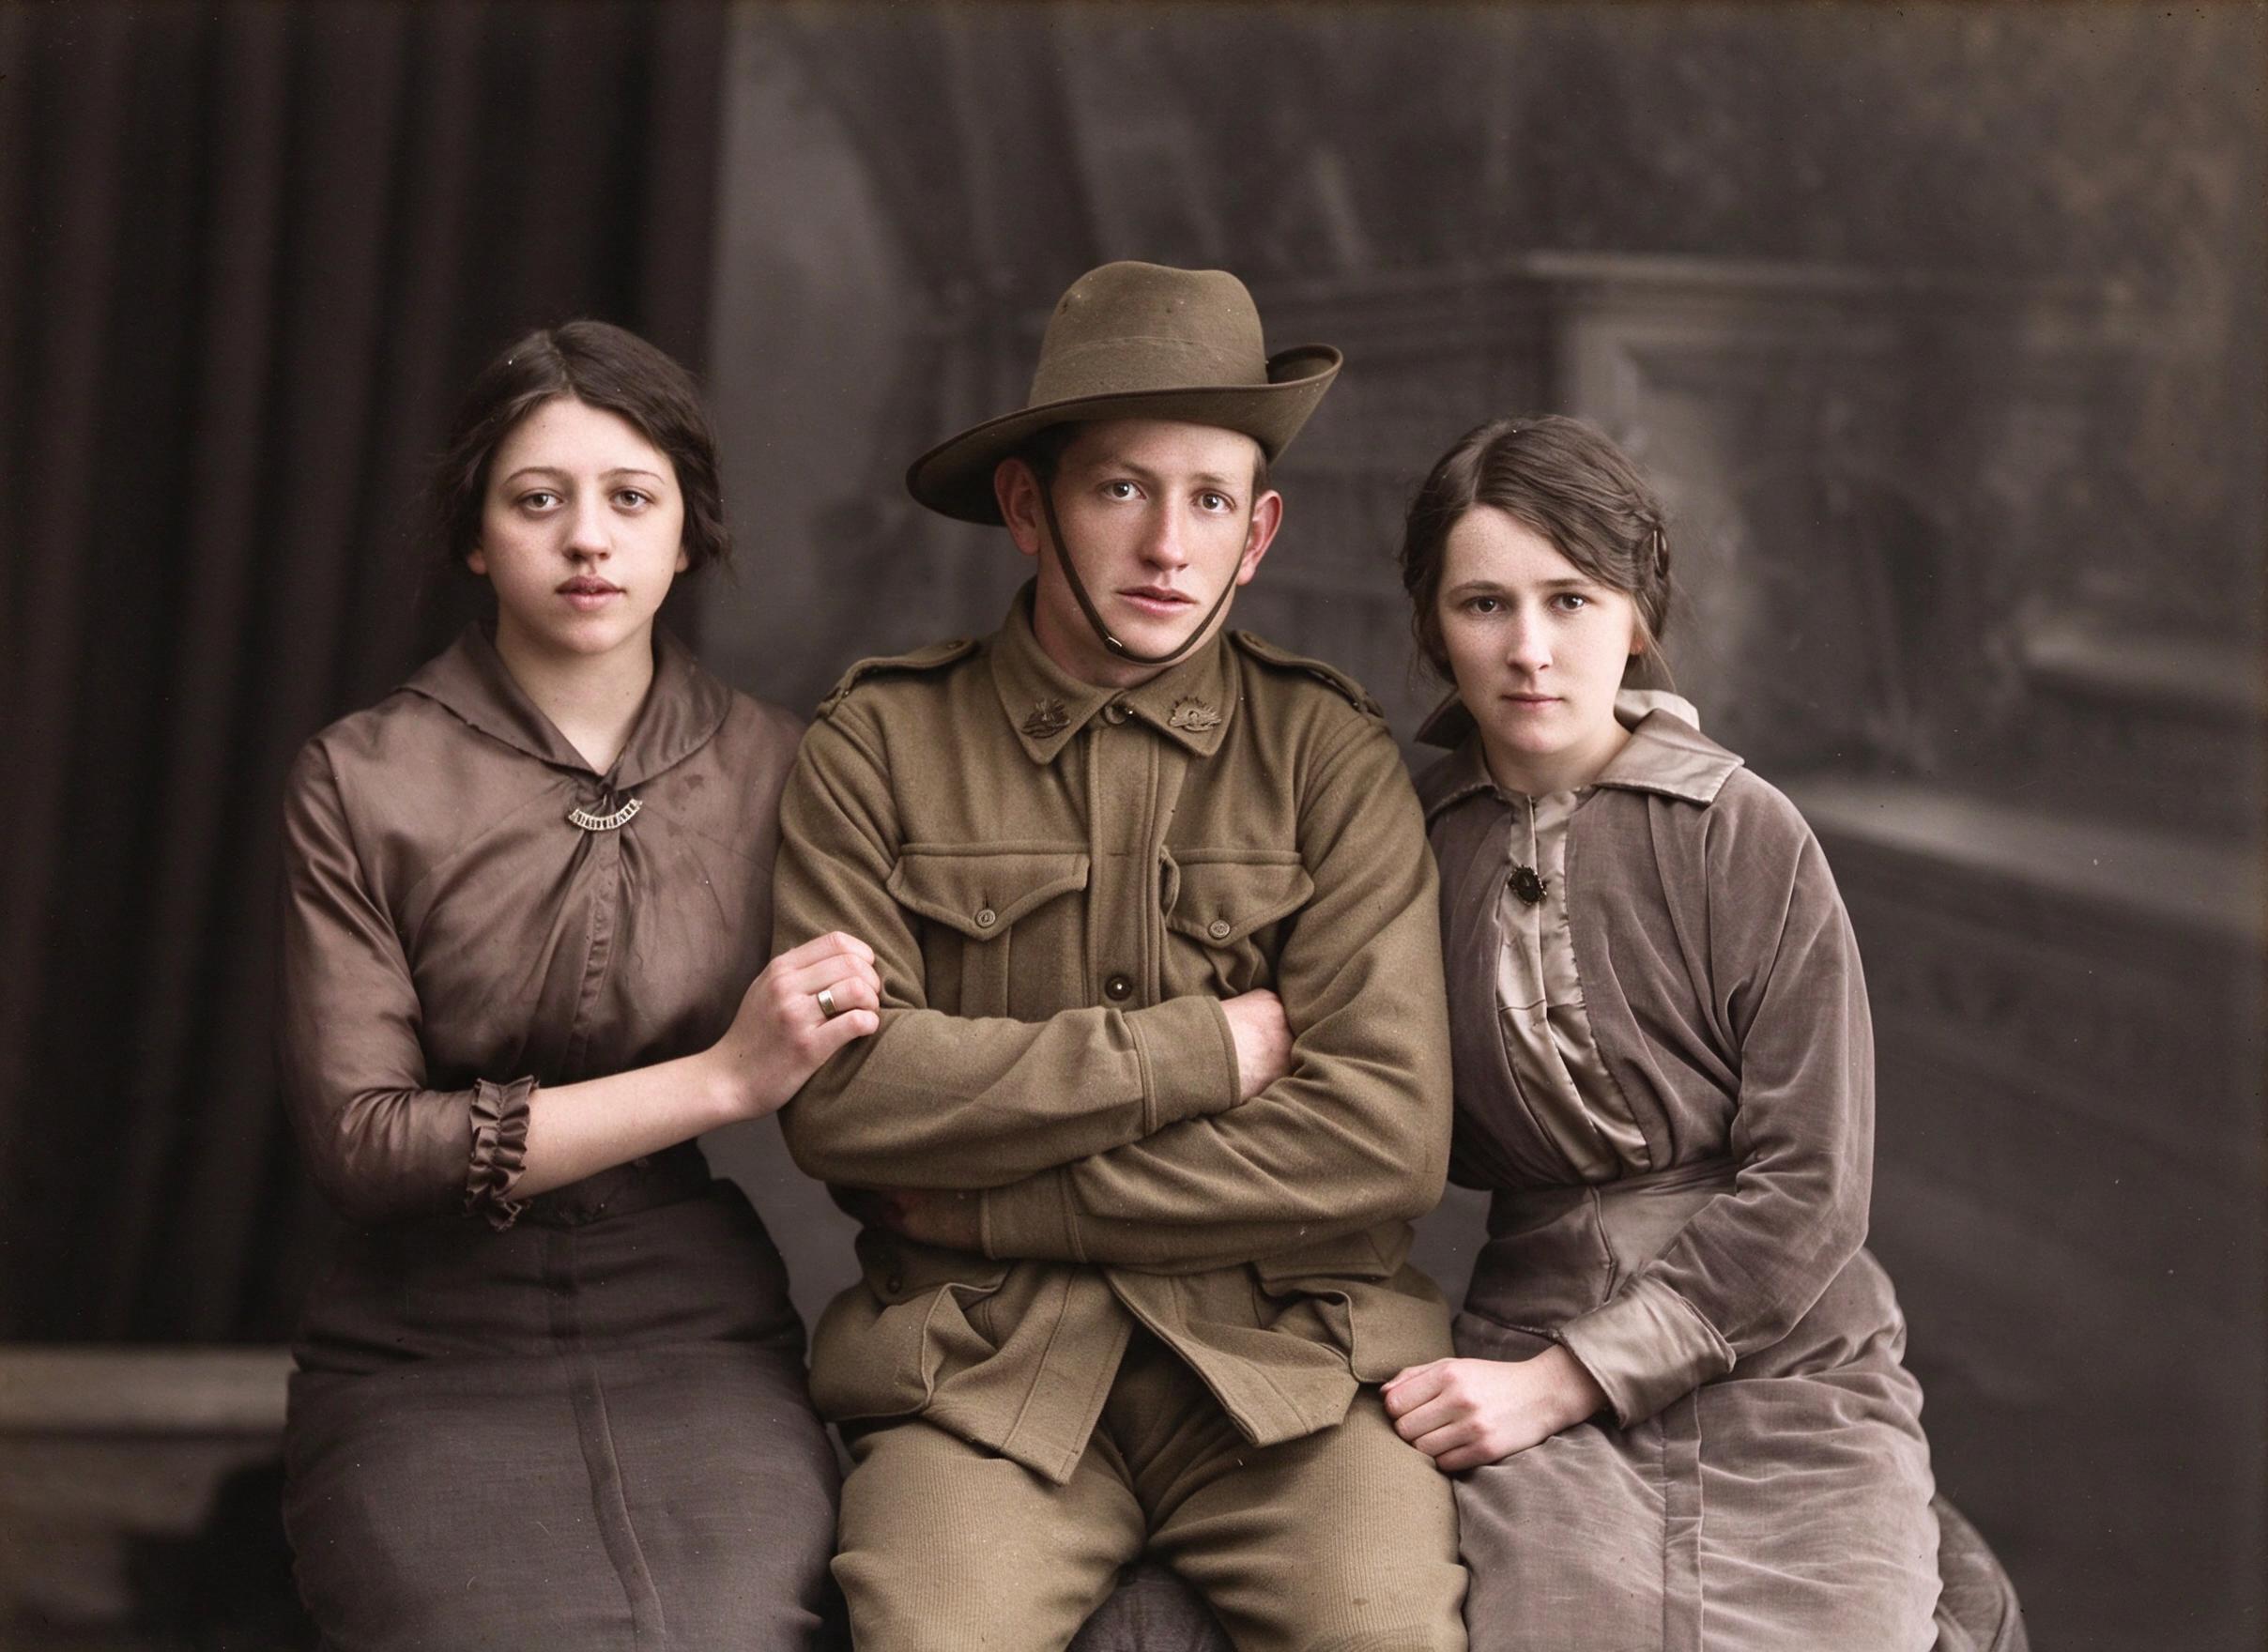
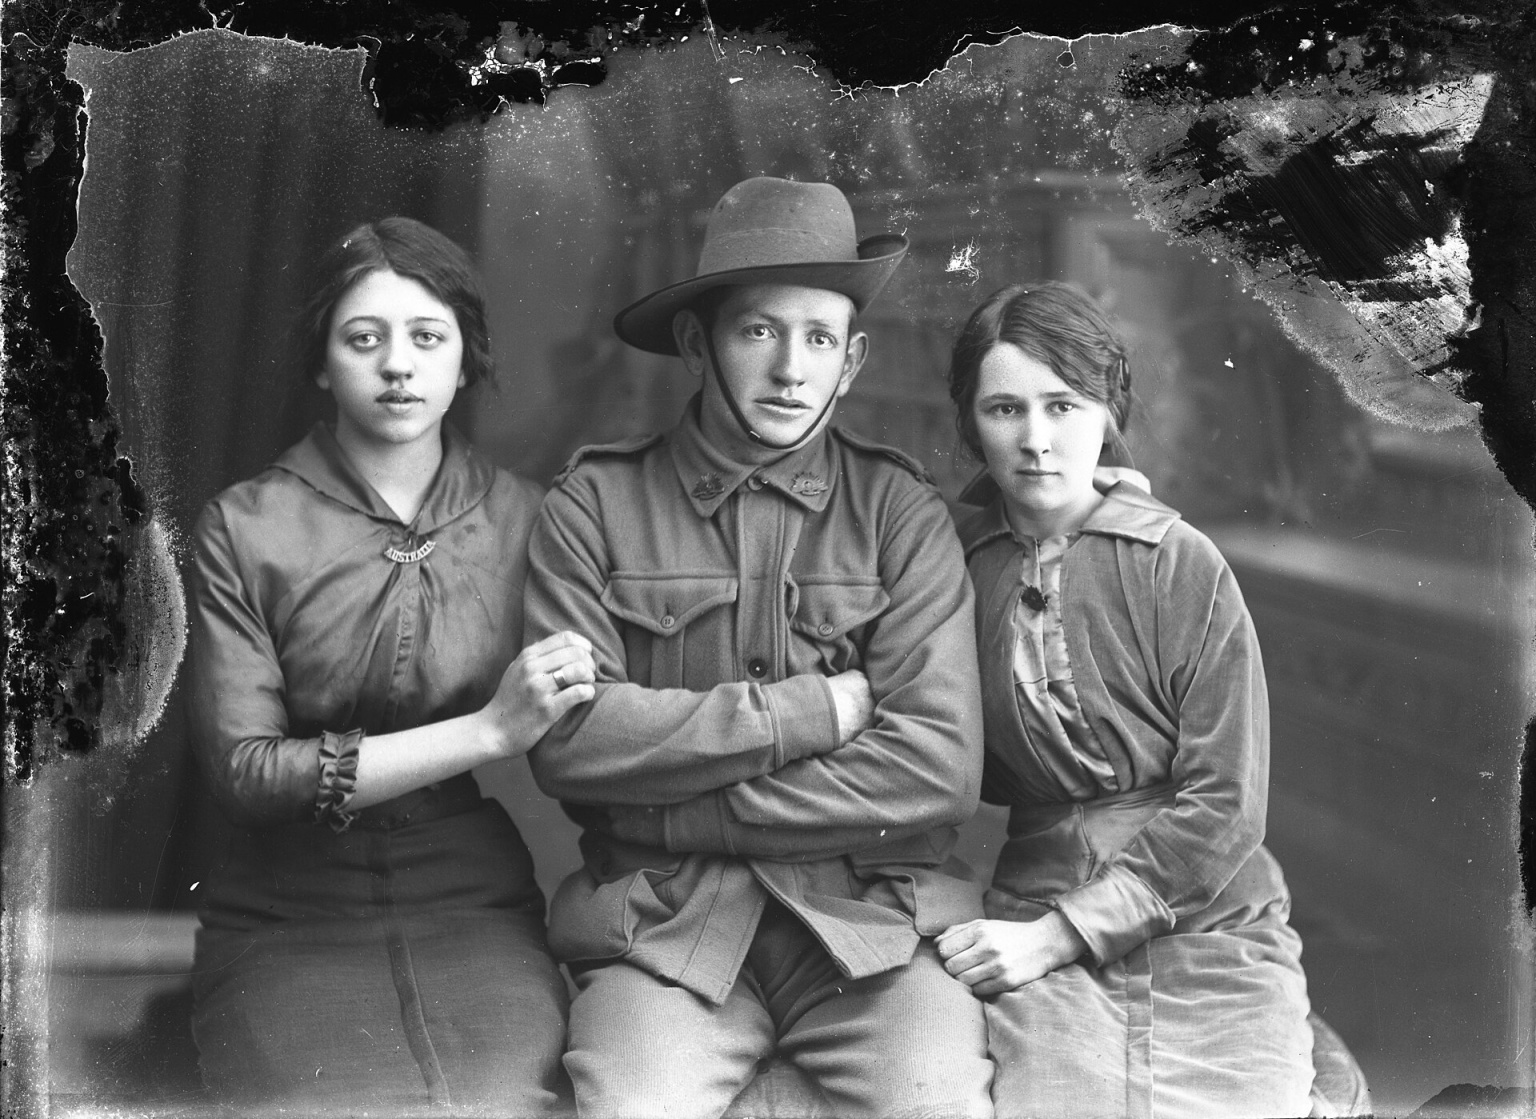
Damaged black-and-white portrait of three people in early twentieth-century clothing
Drag to compare the original with the AI repair; rebuilt details are interpretations, not recovered facts.
Check the same part on both sides of the slider. Look at faces, hands, clothing edges, signs and the background around each repaired mark. The model can make a damaged area look continuous while still changing what was in it. If a detail is important to your family, keep the original nearby and decide whether the new version is faithful enough to use.
Restore compares detected faces with the source and can flag a result for review; this check cannot confirm identity. On a paid Restore, a flagged result is delivered and charged 1 credit total; it is not refunded.
Compare the result and keep your original scan beside it.
The model can rebuild visible marks across a print. Fine lines may fade into the image, while a deep scratch can leave a changed edge or texture.
Fold lines and crease marks can be repaired where the photograph still shows the scene on either side. A hard fold through a small face is harder to reconstruct.
Torn areas and patches of lost emulsion can be filled from nearby visual cues. The fill is a plausible continuation, not a recovered piece of the original.
Some visible spots and worn patches can be softened as the damaged area is rebuilt. Keep a copy of the original because texture and small marks can also change.
A small gap with intact image around it gives the model more context than a large missing section. It may continue a wall, sky or piece of clothing from nearby pixels, but it cannot know whether that guess matches the original scene.
Results depend on the size and location of the damage. Restore is not a promise that every mark disappears; inspect the repair at a useful zoom before you keep it.
Bring a damaged album scan into a family archive while keeping the untouched scan as a reference.
Prepare a careful copy of a meaningful portrait for a gathering or remembrance.
Review a repaired image before ordering a fresh print or making a personal gift.
Choose the photographs from a box or album that matter most, and keep each untouched scan for comparison.
When a large section is gone, the model has to invent what might fit. A new sleeve, expression, letter or background detail is an interpretation, not a fact about your family.
Damage across a face may be rebuilt differently. Face checks can flag some results for review, but they do not verify who a person is; compare the output yourself before sharing a portrait.
Restore edits the image you upload. It cannot retrieve a deleted file, an earlier scan, or hidden information from a damaged memory card. Look for another copy or ask a photo lab about the physical print.
Generated detail can look convincing without being true. Keep the original alongside the restored copy, and do not use filled details as proof of clothing, text, identity or setting.
Choose a scan or phone photo of the print. A flat, evenly lit image gives the model a cleaner view of scratches and crease lines.
The tool works on worn and damaged areas. Keep expectations realistic when the print has large gaps or tiny, damaged faces.
Add color is on by default. Turn it off in Studio if you want a repaired monochrome or sepia result.
Move the comparison line across the original and result. Check eyes, mouths, hands, writing and any detail that matters to your family.
Save the result after you have checked it. Keep the unedited scan as a reference and as a record of the original print.
Rebuilds visible damaged areas; generated details need review.
Adds color without making damage repair its main job.
Use when blur is the main problem.
Use for a light sharpness adjustment.
Remove loose dust from the scanner glass and the print surface with a soft, dry cloth or air blower. Do not rub a fragile, flaking photograph.
Place the whole photo on the scanner bed and include its edges. A phone capture should be parallel to the print so the corners do not stretch.
For phone photos, choose bright indirect light. Avoid direct flash, reflections and a shadow from your hands or phone.
Turn off filters, portrait effects and automatic retouching. Keep the first scan so you can compare the restored version with the original capture.
If you have several copies, start with the sharpest and least compressed one. A restoration cannot add back detail that is missing from the file.
Do not press a curled, cracked or flaking photo flat under a scanner lid. Avoid liquids, erasers and adhesive on the image surface. If the print is fragile, ask a photo lab or archive how to make a safe digital copy.
On a paid Restore, a flagged result is delivered and charged 1 credit total; it is not refunded. If a photo fails, nothing is charged. Only a generation failure is refunded in full. See current credit options on Pricing.
Photos are kept 30 days on every plan, free accounts included. After that period, they are deleted. Your photos and results are not used to train or improve AI models by us. Our AI providers receive a photo only to produce the result you asked for. We do not make a blanket promise about every provider's own practices; each handles data under its own terms. Download any copy you want to keep before it expires. Read the Privacy Policy for details.
Start with a flat, evenly lit scan or a clear phone photo of the print, then run Restore. It rebuilds visible damage such as scratches, creases, torn edges and worn areas. Add color is on by default, and you can turn it off to keep the repaired result black and white. Compare the result with the original before downloading.
It can rebuild visible scratches, crease lines, torn edges and damaged patches. Rebuilt areas are new interpretations, so small details may differ from the print. A tear that removed much of a face or object leaves less information to work with. Keep the original scan and check any repaired detail that matters to your family.
Yes. Add color is on by default in Studio, but you can switch it off before you run the repair. The result then stays black and white or sepia while the damaged areas are rebuilt. The color option changes the look; it does not make the reconstruction historically exact.
It can change details in a damaged face because those areas have to be rebuilt. Restore compares detected faces with the source and can flag a result for review; this check cannot confirm identity. On a paid Restore, a flagged result is delivered and charged 1 credit total; it is not refunded. Compare each face yourself before sharing or printing, especially when the original face is small or heavily damaged.
Restore can process group photos. It detects faces and can flag a result for review when the face checks find a difference. Compare each person with the source image before sharing.
It can fill some missing areas, but the new pixels are generated, not recovered from the print. Original text is preserved where the tool can, but it cannot reliably reconstruct letters that are already gone. Check names, dates and signs yourself, and do not treat generated detail as historical evidence.
Restore focuses on damage such as scratches, creases, tears and worn patches. For a photo where blur is the main problem, try Unblur on the home page instead. For slight softness, Sharpen is a separate option. Neither tool can recover detail that is absent from the image.
As a guest you get 1 free photo a day with no sign-up, and results have no watermark. Signing up adds 3 free credits. Tools use 1–2 credits per photo. Restore costs 2 credits per photo, shown before you run it. If a photo fails, nothing is charged. Only a generation failure is refunded in full. A face-review result is still delivered and charged as stated above. See the Pricing page for current credit packs and plans.
The finished image is fit back to the original photo's dimensions. Restore has no HD tier.
Restore runs in the background and the result appears in Studio when it is ready. Check the result against the original before downloading.
Photos are kept 30 days on every plan, free accounts included. After that period, they are deleted. Your photos and results are not used to train or improve AI models by us. Our AI providers receive a photo only to produce the result you asked for. We do not make a blanket promise about every provider's own practices; each handles data under its own terms. Download a copy you want to keep before then. See the Privacy Policy for more about how photo files are handled.
Choose Restore for visible physical damage, Colorize to add color to a black-and-white or faded photo, and Unblur when motion or missed focus made the photo soft. If the photo is only slightly soft, Sharpen is the simpler fit. Each tool has a different job.
Yes. The photos you upload and the results you get are yours, and you can use them freely, including commercially, for example in a book, a display or a product. You need to have the right to use the original photo, and you remain responsible for any third-party rights in how you use it.